
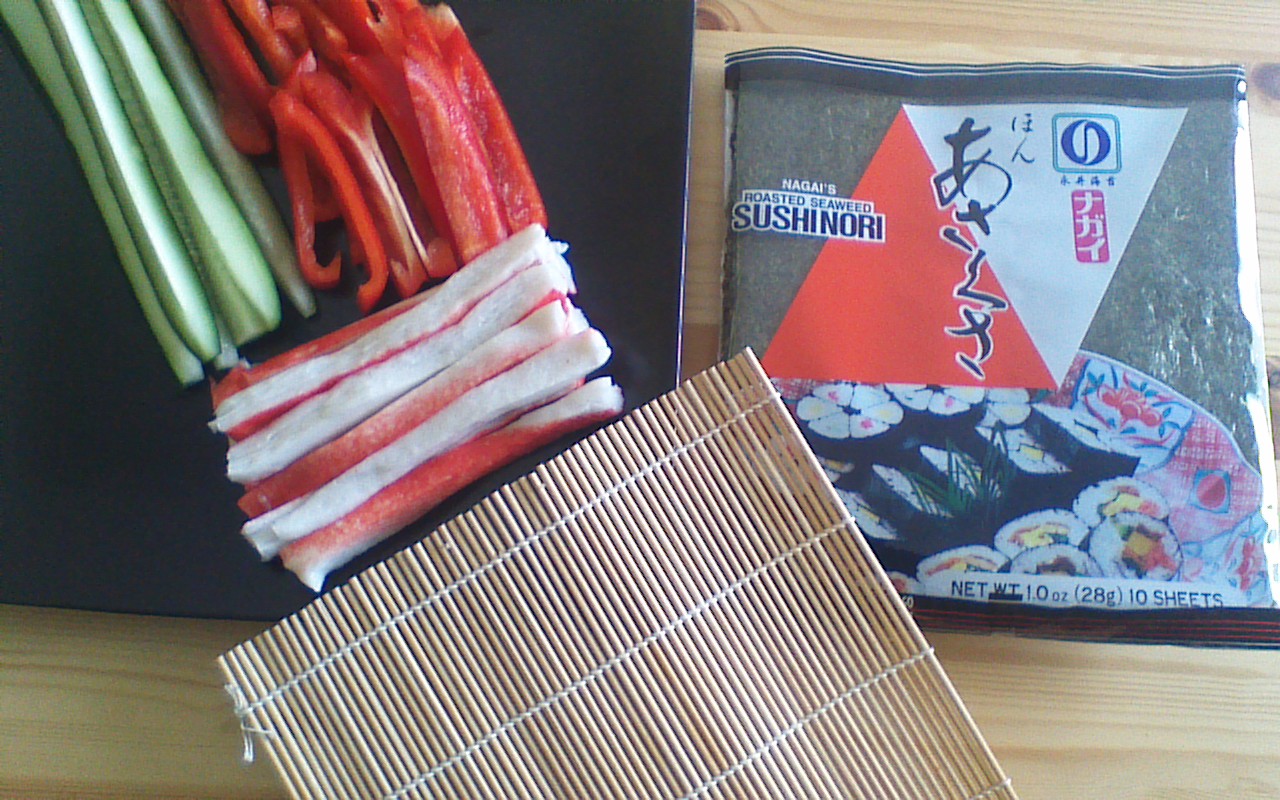
 First, let’s dispel of a common American myth… sushi does not mean “raw fish.” The word sushi refers to food made with cold, vinegared rice. Often this rice is topped with raw fish or other seafood… but not always. It is perfectly legitimate to prepare sushi using other accompaniments, such as vegetables or cooked eggs. Maki Sushi, shown above, refers to sushi rice and any variety of fillings which have been rolled into sheets of toasted seaweed called nori. These rolls are then cut into bite size pieces, and are often served with several condiments including pickled ginger, wasabi or Japanese horseradish, and soy sauce.
If this sounds unfamiliar, take a peek at the Asian foods section of your local supermarket. Even in small towns and tucked away areas, you may be pleasantly surprised to find sushi rice (a short grain, white rice), nori sheets, and wasabi. Adding Maki Sushi to your kitchen repertoire is a fun and healthy way to eat fresh! Enjoy!
 Ingredients (Makes 6 rolls, or 48 bite size pieces)
2 cups sushi rice
3 cups water
1/4 cup rice vinegar
2 tablespoons sugar
 1/4 teaspoon salt
Assorted fillings, cut into long, thin strips. Shown (left) are cucumber strips, red pepper strips, and surimi (mock crab sticks made from whitefish). Other ideas include thin slices of avocado, carrot, and smoked salmon. Use your imagination!
Directions
 Step 1) Rinse rice several times in cold water until water drains clear.
Step 2) After rinsing, combine rice, 3 cups water, and 1/4 teaspoon salt in a large pot with a tight fitting lid. Bring to a boil, reduce heat to a low, cover, and simmer for approximately 15 minutes or until liquid is absorbed.
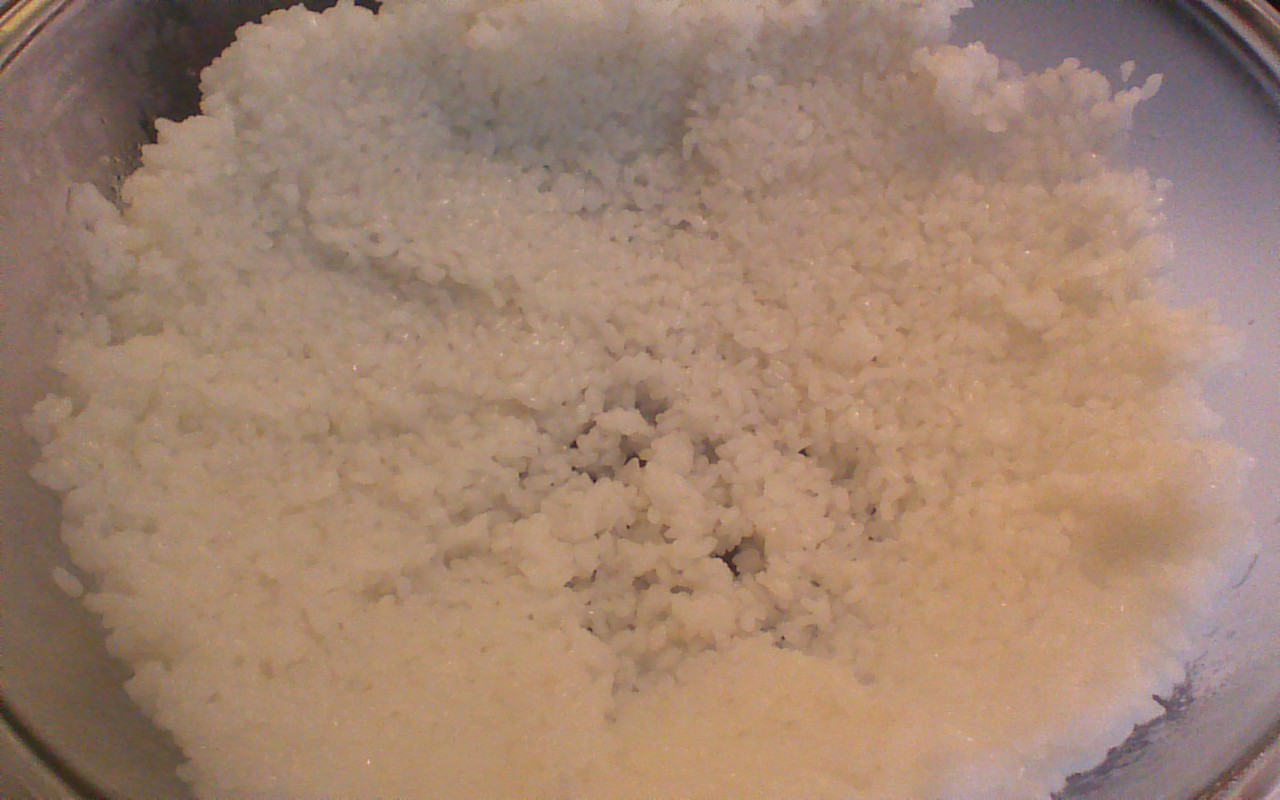
Step 3) Gently transfer cooked rice to a large bowl and spread rice up the sides of the bowl (gently!) with a rubber spatula.
Step 4) Combine rice vinegar and sugar in a small bowl. Microwave for a few seconds until lukewarm. Stir until sugar dissolves. Then, drizzle the vinegar mixture all over the rice.
 Step 5) Using a rubber spatula, gently fold the rice over a few times to distribute the vinegar as evenly as possible without mashing the rice. Spread the rice up the sides of the bowl again. The rice should look glossy. Cover the bowl with a slightly damp cloth and let sit at room temperature for one hour.
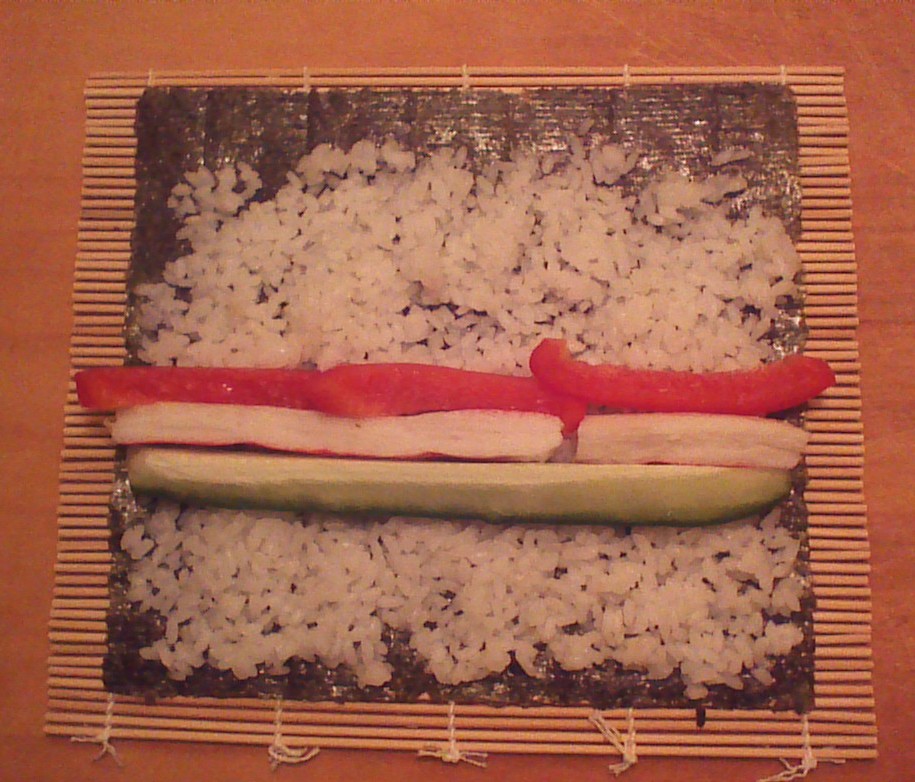
Step 6) Center one sheet of nori in the middle of a bamboo sushi roller (very inexpensive; sold in markets next to the nori sheets). As an alternative, try using a thin, flexible silicon baking mat instead of the bamboo.
Step 7) Carefully spread 1/2 cup of rice all over the sheet of nori, except for 1 inch at the top. I find it is easiest to drop small teaspoons of rice all over the sheet and then spread them together – this helps avoid tearing the nori sheet.
 Step 8) Place your fillings over the rice about 1/3 of the way up from the bottom of the nori sheet, as shown.
Step 9) It’s time to roll up your Maki Sushi! This takes a bit of practice, but it’s not rocket science. Using your bamboo or silicon mat, fold the bottom of your nori sheet up until it just barely covers your filling. Press firmly and evenly along the bamboo or silicon, to give the roll a tight, uniform shape. Continue rolling the nori sheet, being careful not to roll the bamboo or silicon “into” your Maki Sushi.
 Step 10) When you get to the top inch, dip your finger in water or vinegar and run your finger along the top edge of the nori. This will help to seal your Maki Sushi. Set aside, seam side down, and continue with your next roll.
Step 11) Slice each roll into 8 pieces using a very shart, non-serrated knife.
Step 12) After the effort that led you to this last step, be sure to respect the Japanese tradition of presenting food in an artful manner. Have fun with this! Put some thought into arranging your Maki Sushi on individual serving plates or a buffet platter, and garnish as you see fit. Remember that wasabi, pickled ginger, and soy sauce are traditional condiments, but don’t be afraid to experiment with other dipping sauces and toppings.
Last but not least… It really is OK to pop an entire piece of Maki Sushi into your mouth. When pieces are small enough to make this feasible, eating Maki Sushi in one bite is considered proper etiquette. If the pieces are too large, though, don’t worry about it.
Do you have questions? Ideas for combinations of fillings? Perhaps a photo of your own Maki Sushi that you’d like to share? Crowded Earth Kitchen welcomes your comments, below!

Sushi always looked so complicated to make. Thank you for breaking it down and making it look possible. I’m ready to get a bamboo mat and start rolling! I’m thinking of adding finely diced cooked shrimp to my filling.
It’s such a great party food, because it falls into the “looks complicated but is really super easy” category – like the funny Rice Crispie treats commercial with the woman with flour all over her clothes. 🙂 Diced shrimp sounds good – I bet that would be delicious with a spicy mayo.
I love making maki rolls. My favorite filling is definitely avocado! Maki rolls need a little practice and take some time to make, but they are always worth it – and very popular at parties 🙂 Recently I got interested in kimbap – which is korean maki rolls – the rice is seasoned differently (with sesame seed oil and salt) and it’s also very delicious 🙂
I haven’t tried kimbap, but I adore sesame seed oil, so I imagine I would enjoy this!