
 Delicious, nutritious, simple, and elegant – what’s not to love? Dried nori sheets are available in most supermarkets now, and are (or should be) very reasonably priced. Pick up a package, and have some fun in your kitchen today!
 Ingredients (Makes 6 rolls, or 48 bite size pieces)
2 cups sushi rice
3 cups water
1/4 cup rice vinegar
2 tablespoons sugar
 1/4 teaspoon salt
8 ounces of frozen salmon fillet
1 tablespoon soy sauce or tamari
1 tablespoon brown sugar
Directions
 Step 1) Rinse rice several times in cold water until water drains clear.
Step 2) After rinsing, combine rice, 3 cups water, and 1/4 teaspoon salt in a large pot with a tight fitting lid. Bring to a boil, reduce heat to a low, cover, and simmer for approximately 15 minutes or until liquid is absorbed.
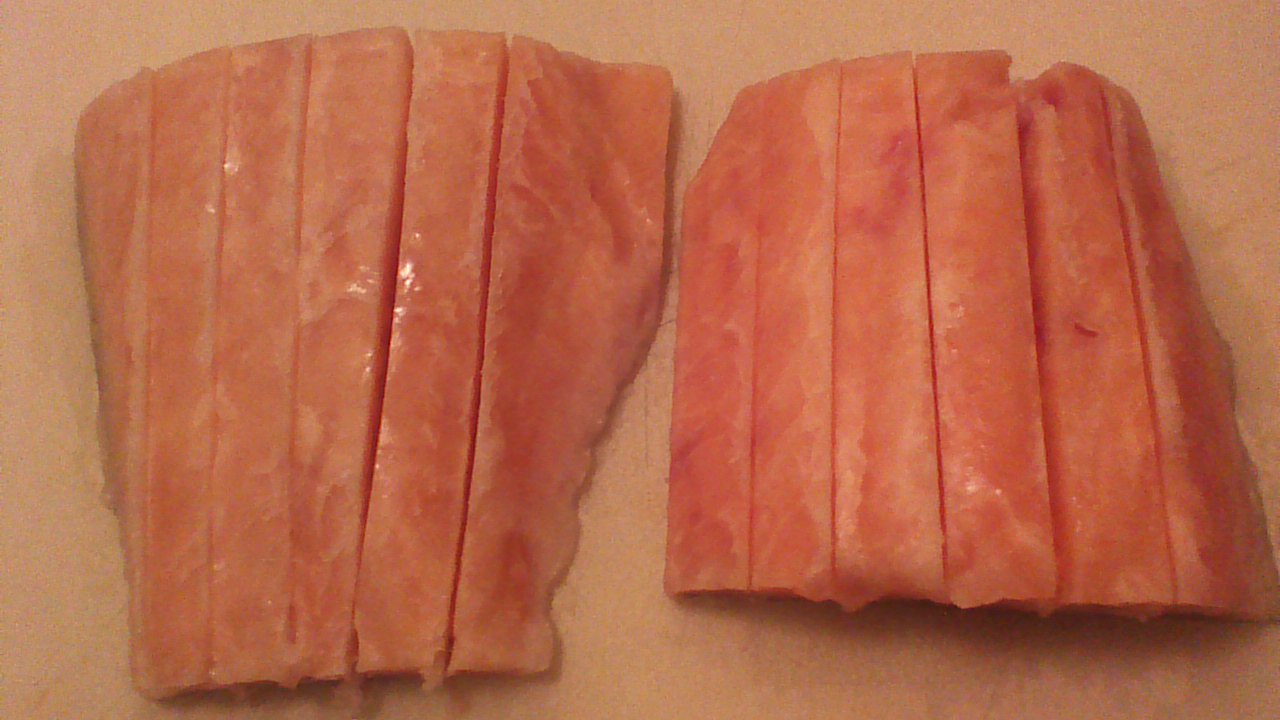
Step 3) While rice is cooking, slice frozen salmon into 1/2 inch slices. Place salmon slices on an oiled baking pan.
 Step 4) Stir together soy sauce and brown sugar. Using a basting brush, coat salmon slices with mixture. Bake salmon in a 400 degree oven for 10 minutes.
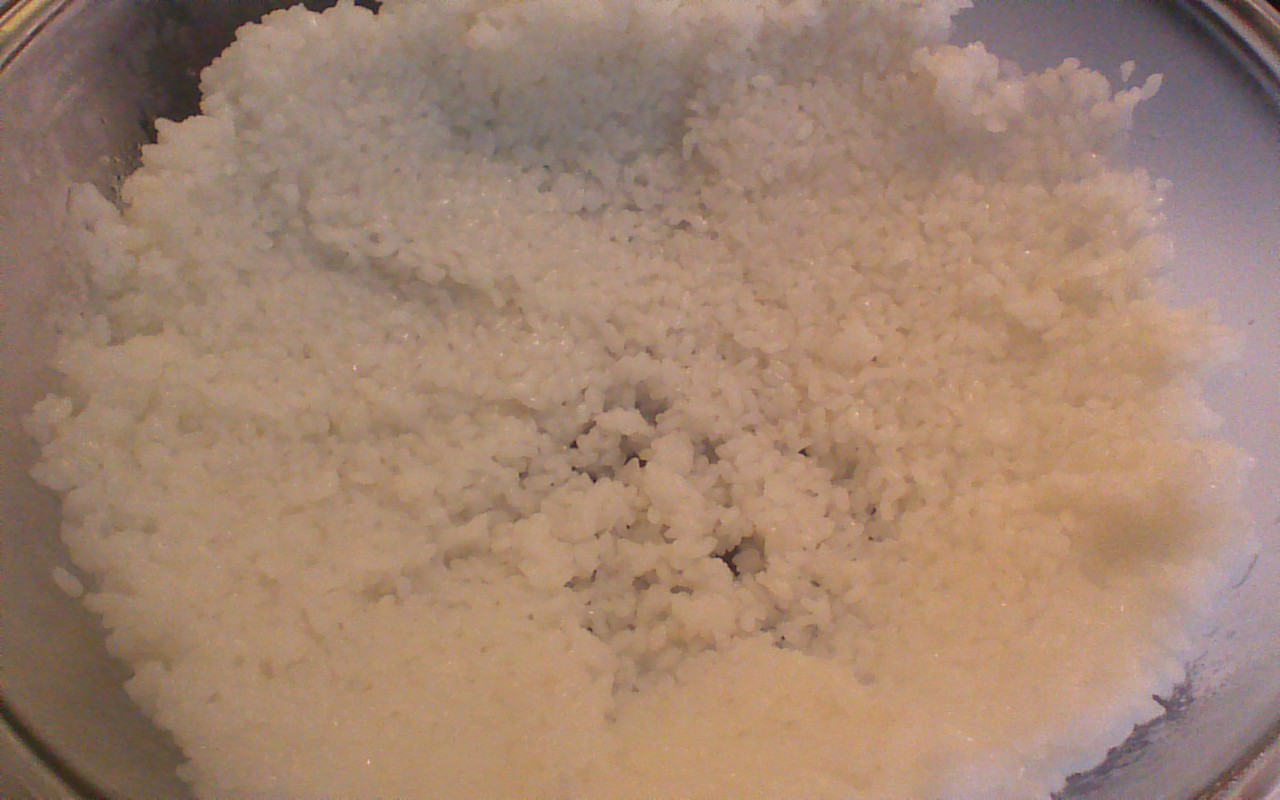
Step 5) Gently transfer cooked rice to a large bowl and spread rice up the sides of the bowl (gently!) with a rubber spatula.
Step 6) Combine rice vinegar and sugar in a small bowl. Microwave for a few seconds until lukewarm. Stir until sugar dissolves. Then, drizzle the vinegar mixture all over the rice.
Step 7) Using a rubber spatula, gently fold the rice over a few times to distribute the vinegar as evenly as possible without mashing the rice. Spread the rice up the sides of the bowl again. The rice should look glossy. Cover the bowl with a slightly damp cloth and let sit at room temperature for one hour.
 Step 8) Center one sheet of nori in the middle of a bamboo sushi roller (very inexpensive; sold in markets next to the nori sheets). As an alternative, try using a thin, flexible silicon baking mat instead of the bamboo.
Step 9) Carefully spread 1/2 cup of rice all over the sheet of nori, except for 1 inch at the top. I find it is easiest to drop small teaspoons of rice all over the sheet and then spread them together – this helps avoid tearing the nori sheet.
 Step 10) Place your salmon pieces end to end over the rice about 1/3 of the way up from the bottom of the nori sheet, as shown.
Step 11) It’s time to roll up your Nori Maki! This takes a bit of practice, but it’s not rocket science. Using your bamboo or silicon mat, fold the bottom of your nori sheet up until it just barely covers your salmon. Press firmly and evenly along the bamboo or silicon, to give the roll a tight, uniform shape. Continue rolling the nori sheet, being careful not to roll the bamboo or silicon “into” your Nori Maki.
 Step 12) When you get to the top inch, dip your finger in water or vinegar and run your finger along the top edge of the nori. This will help to seal your Nori Maki. Set aside, seam side down, and continue with your next roll.
Step 13) Slice each roll into 8 pieces using a very sharp, non-serrated knife.
Step 14) After the effort that led you to this last step, be sure to respect the Japanese tradition of presenting food in an artful manner. Have fun with this! Put some thought into arranging your Maki Sushi on individual serving plates or a buffet platter, and garnish as you see fit. Remember that wasabi, pickled ginger, and soy sauce are traditional condiments, but don’t be afraid to experiment with other dipping sauces and toppings.

Even better–if less authentic–made with brown rice.
That would be delicious, I agree!
My husband taught me to make sushi like this. It’s fun and surprisingly easy!